How to configure form settings and confirmation messages
In this article, we'll guide you through configuring a form's submit button, delivery emails, autoresponder and confirmation message.
To change individual fields, follow how to reorder, edit and remove fields from a form.
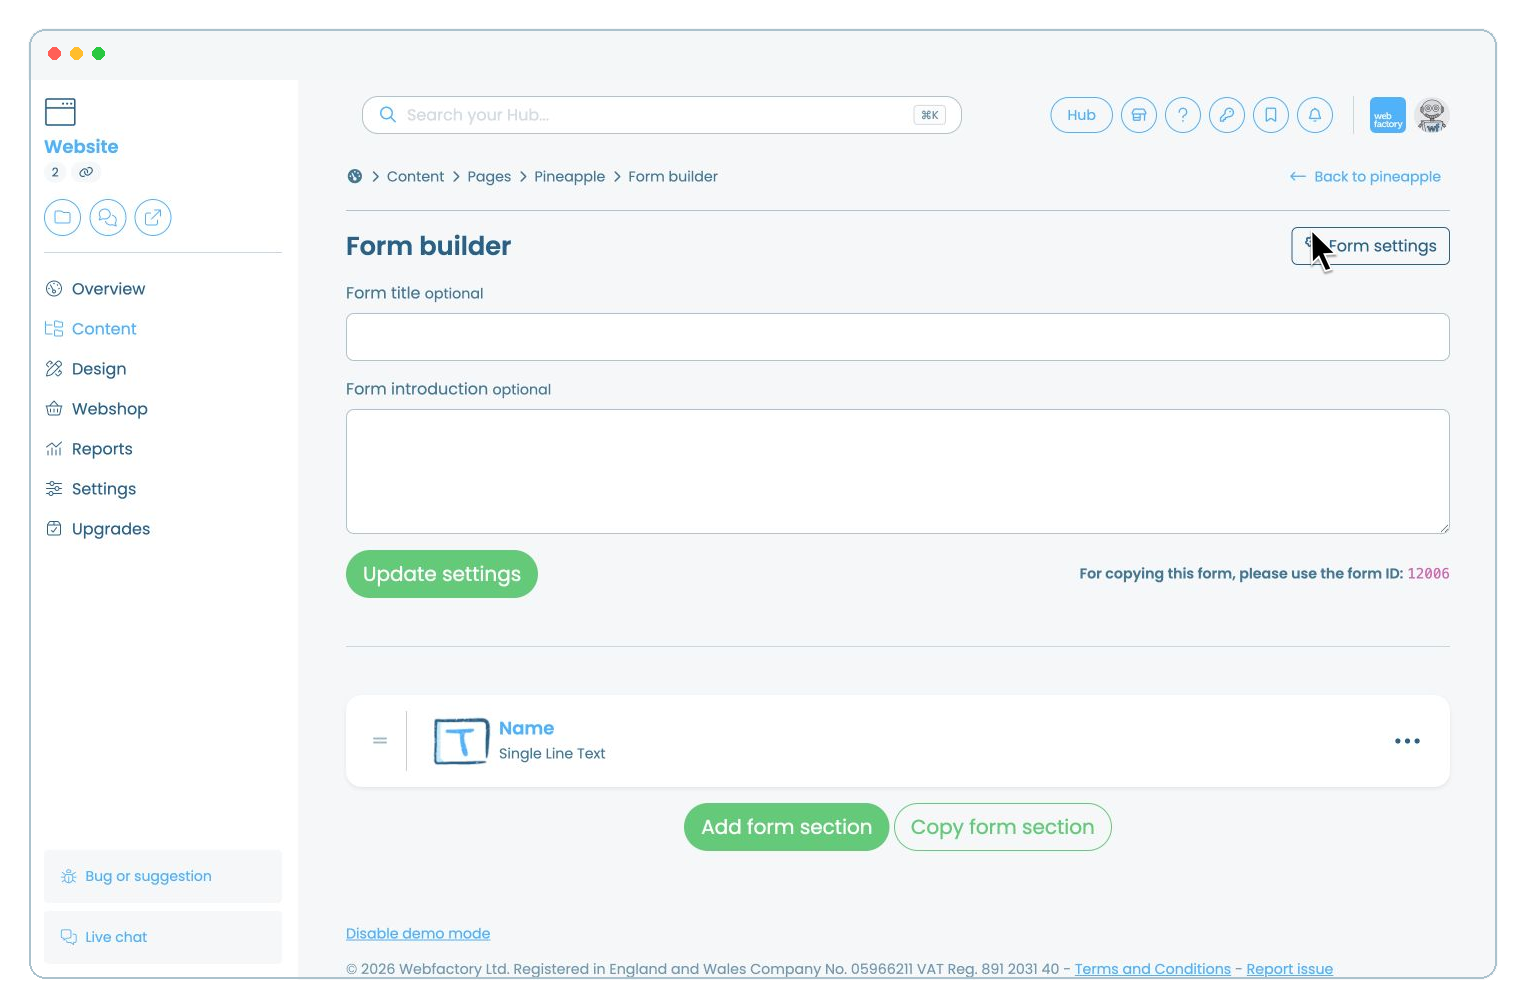
Configure the submit button
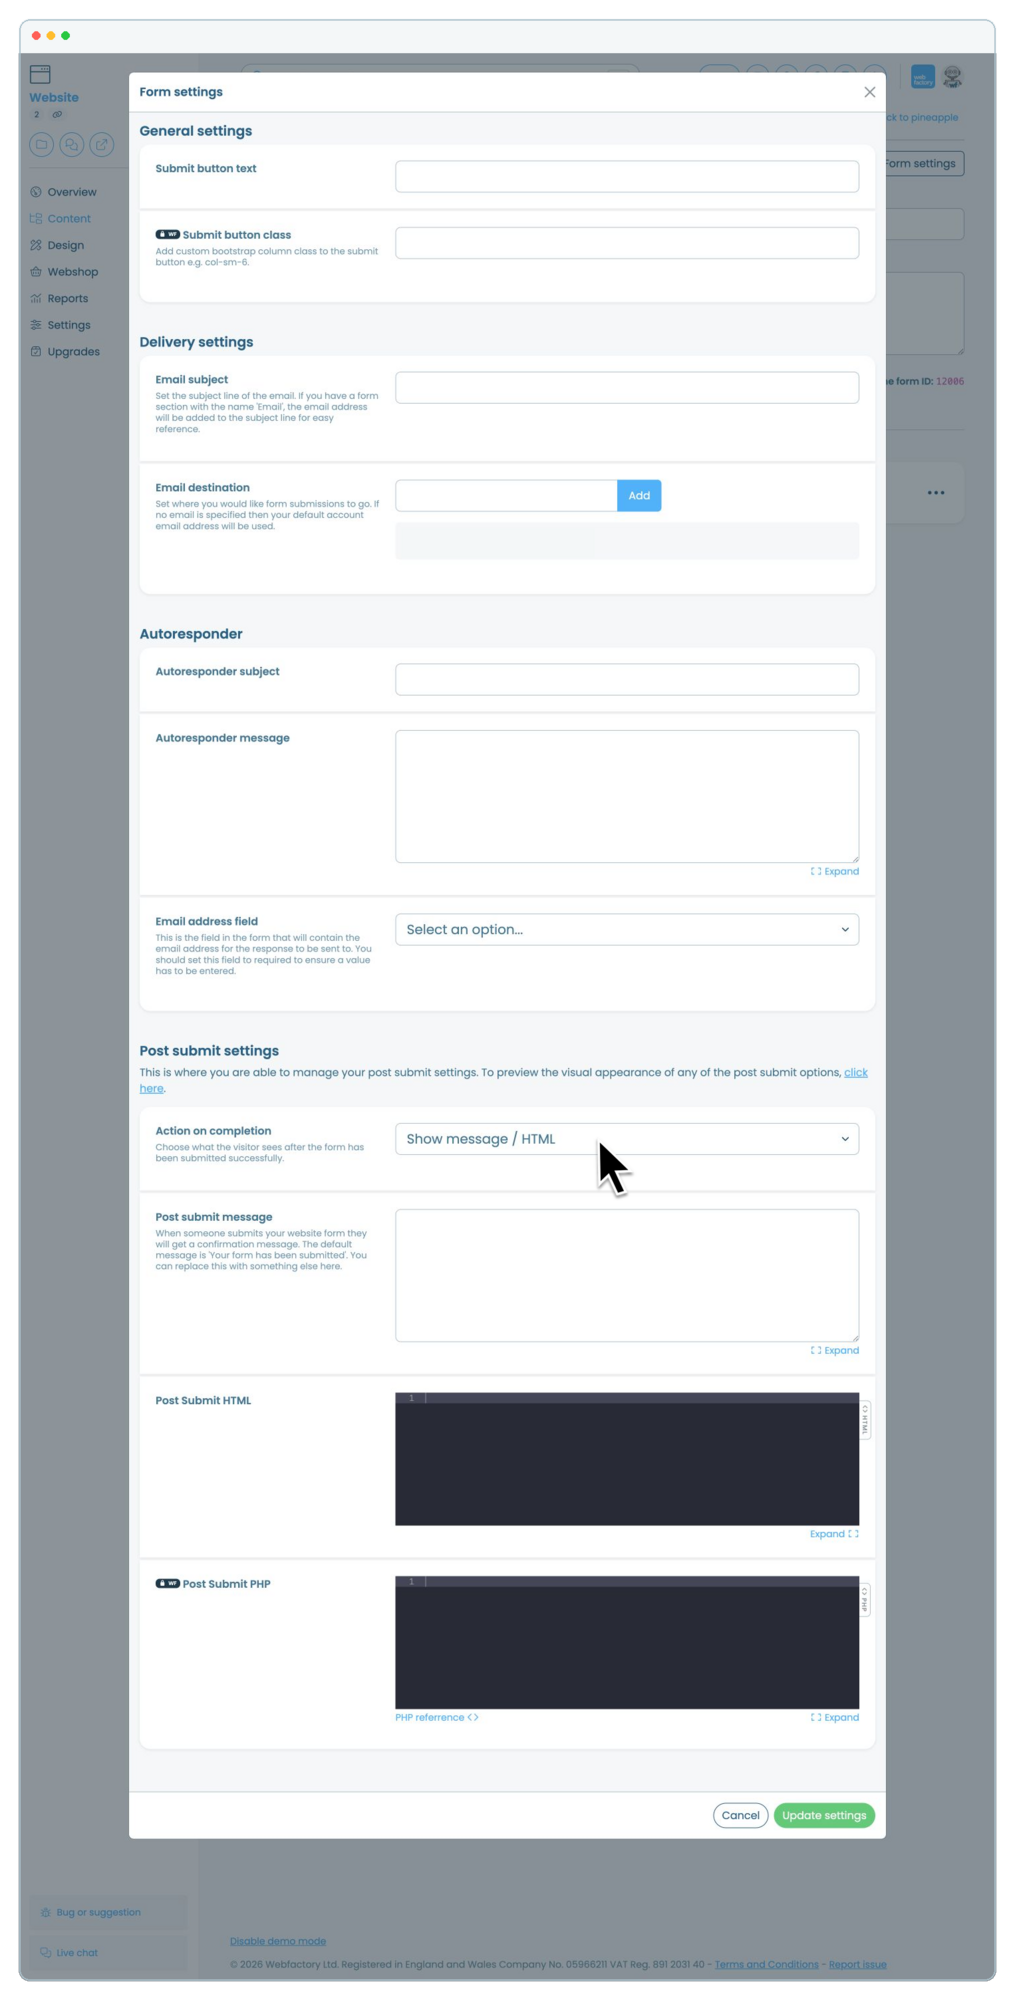
Name the button visitors will see in 'Submit button text'. Leave 'Submit button class' unchanged unless you have been given a custom class.
Choose where submissions are sent
Enter a clear subject in 'Email subject'. Add each recipient in 'Email destination'. If you leave this blank, submissions are sent to the default email address on your account.
Set up an autoresponder
Enter the reply's subject and message in 'Autoresponder subject' and 'Autoresponder message'. Select the form's required email field in 'Email address field' so the reply reaches the visitor.
Add a confirmation message
Under 'Post submit settings', select 'Show message / HTML' in 'Action on completion'. Enter the message visitors should see in 'Post submit message'.
Save and test the form
Click 'Update settings', return to the page editor and click 'View'. Submit a test entry using non-sensitive information, then check the delivery email, autoresponder and confirmation message.
Related articles
- How to add a form to your website
- How to build and edit a website form
- How to change the destination email addresses for your website's forms
- How to copy an entire form from your website
- How to find and view your website's form messages
- How to reorder, edit and remove fields from a form
- How to show or hide a request viewing form on your website
- Introduction to the types of forms you can add to a page on your website