How to add a table to a website page

In this article, we'll guide you through adding a table to a website page and entering your table content.


Step 1

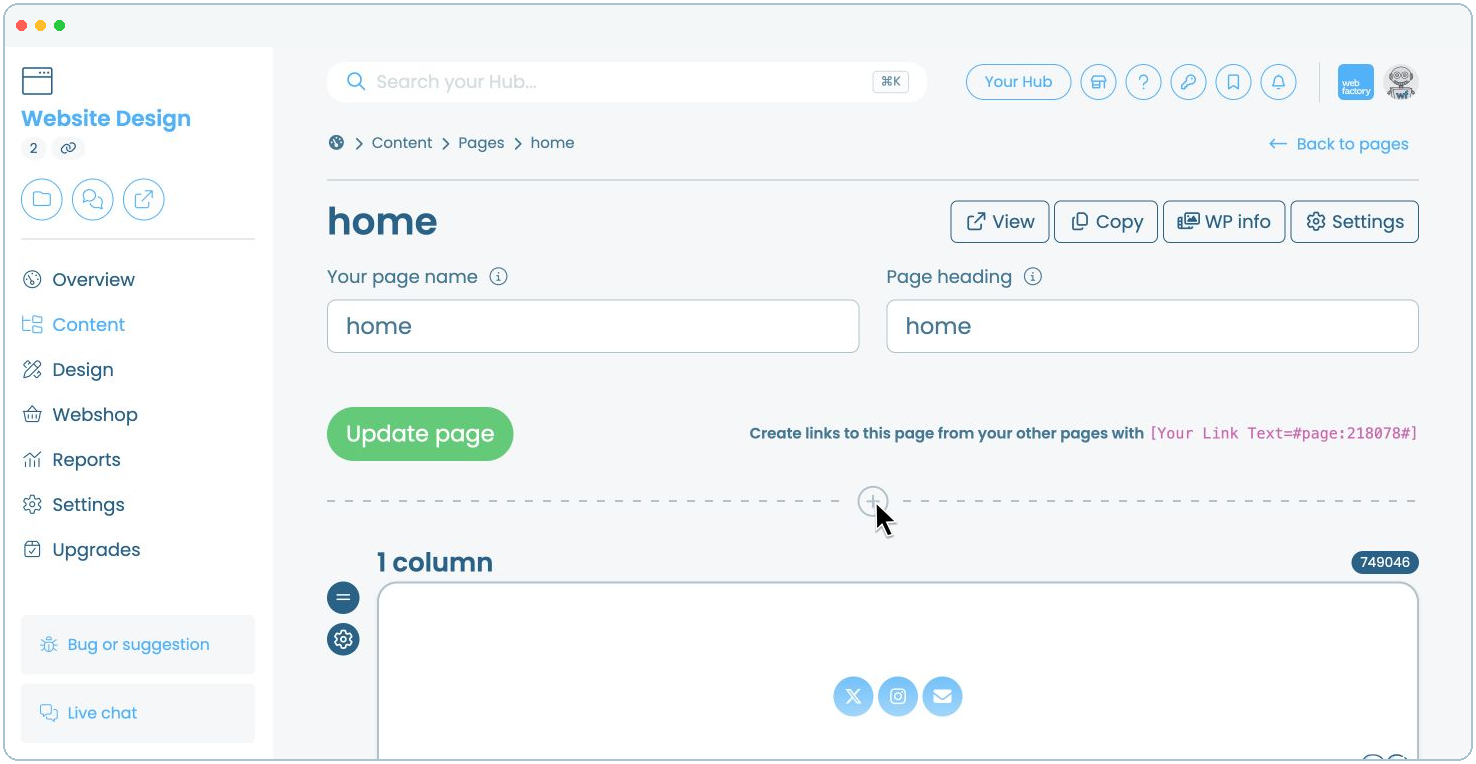
From your website editor, click 'Content'.

Step 2

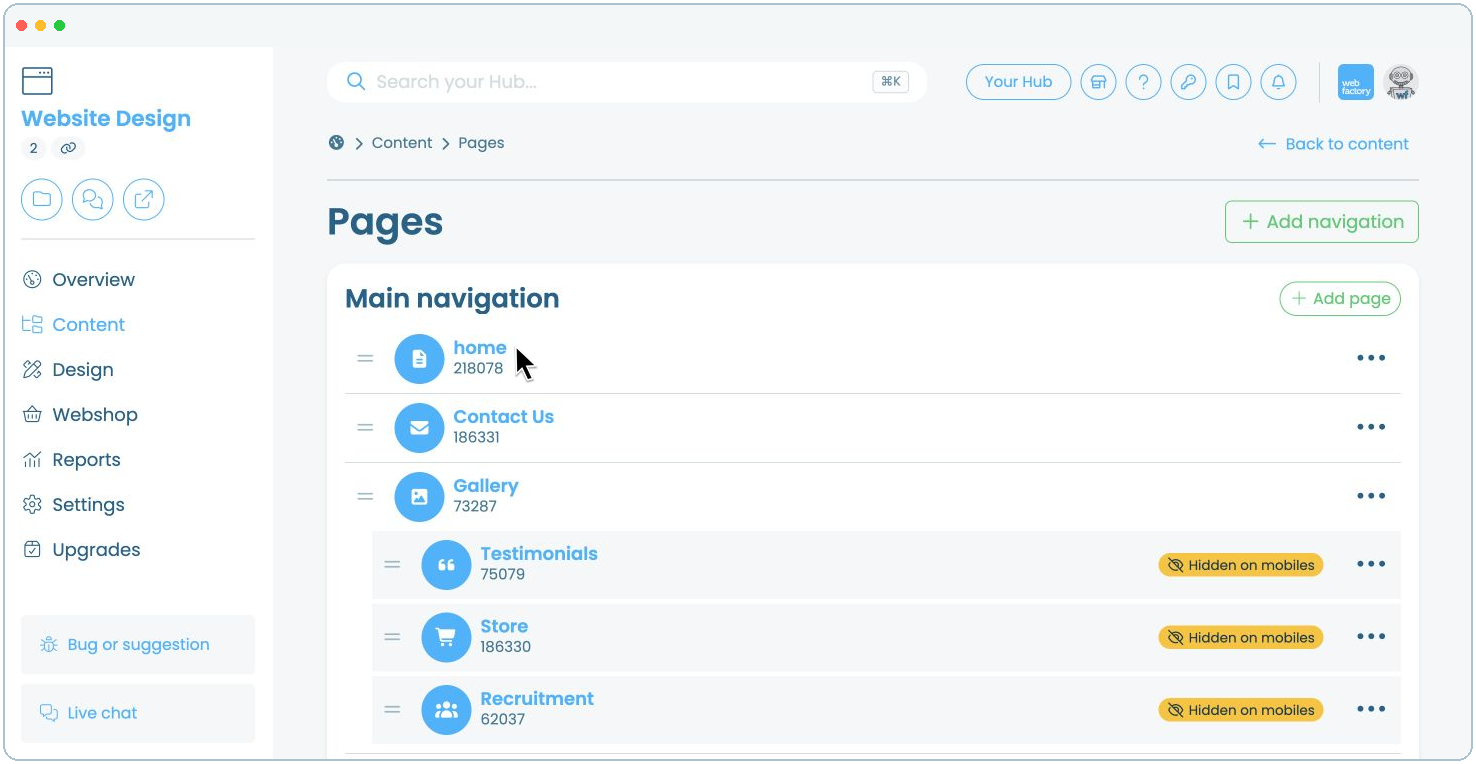
Select 'Pages'.

Step 3

Click the name of the page where you want to add the table, for example 'home'.
Step 4

Click the icon where you want to add a new section.

Step 5

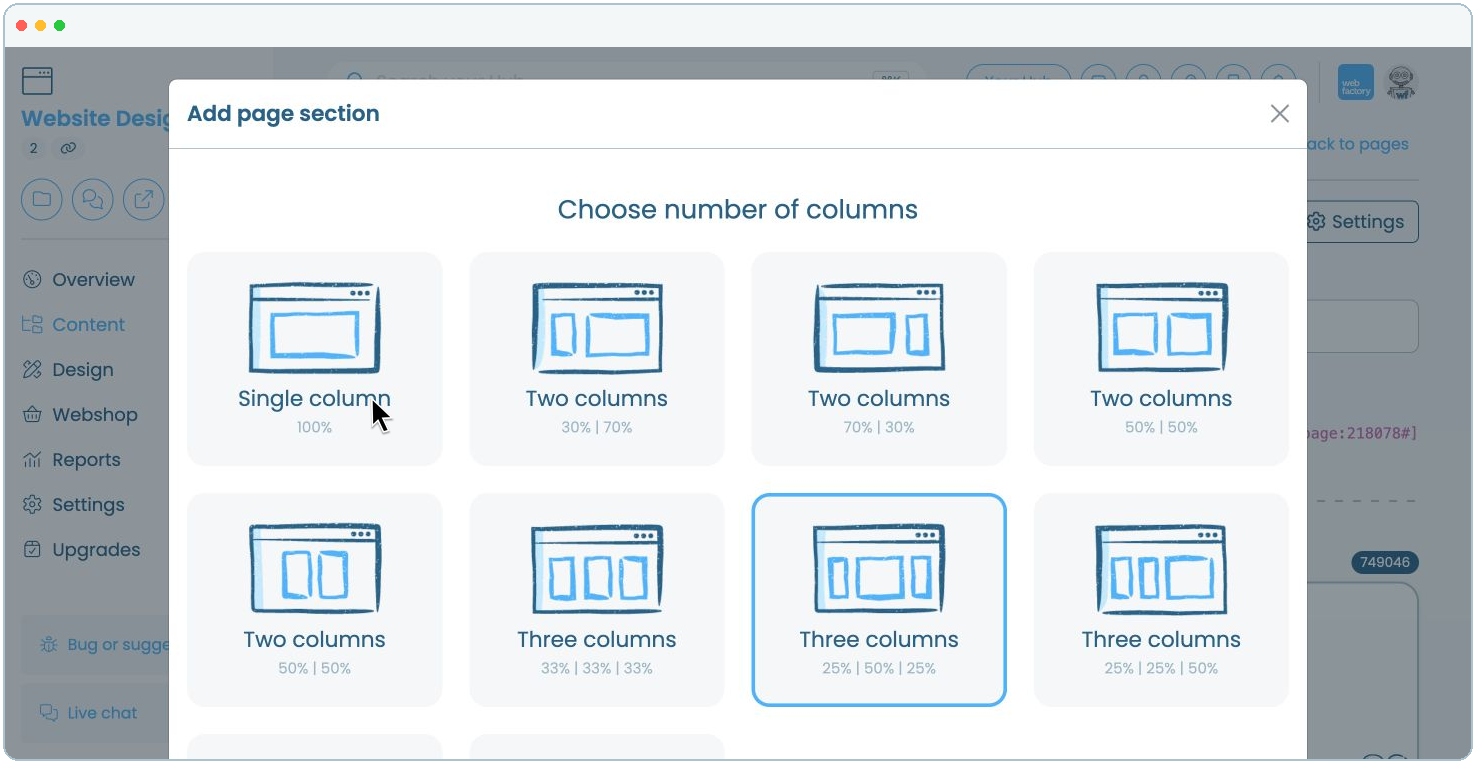
Select 'Single column'.

Step 6

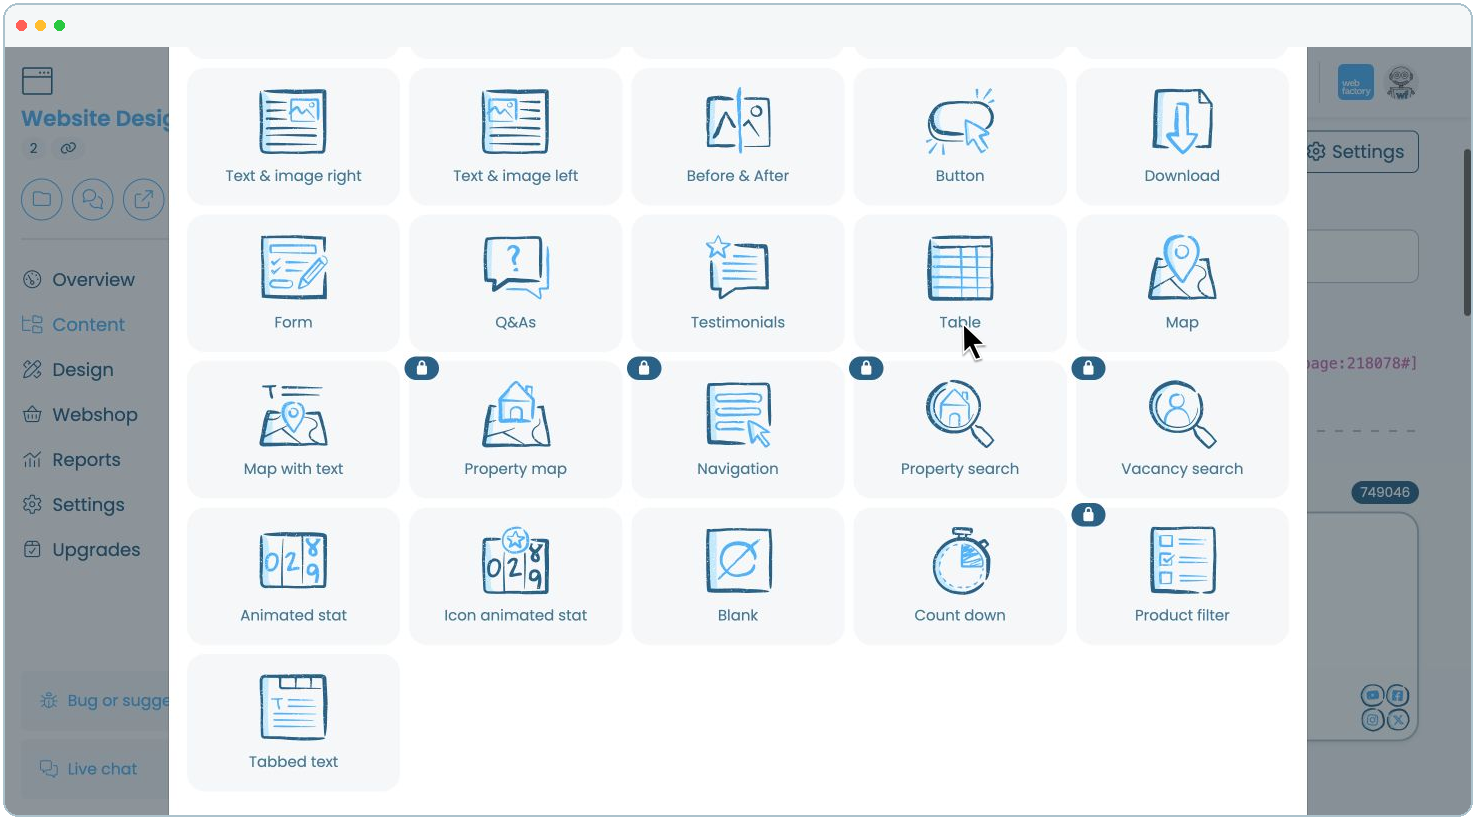
Select 'Table'.

Step 7

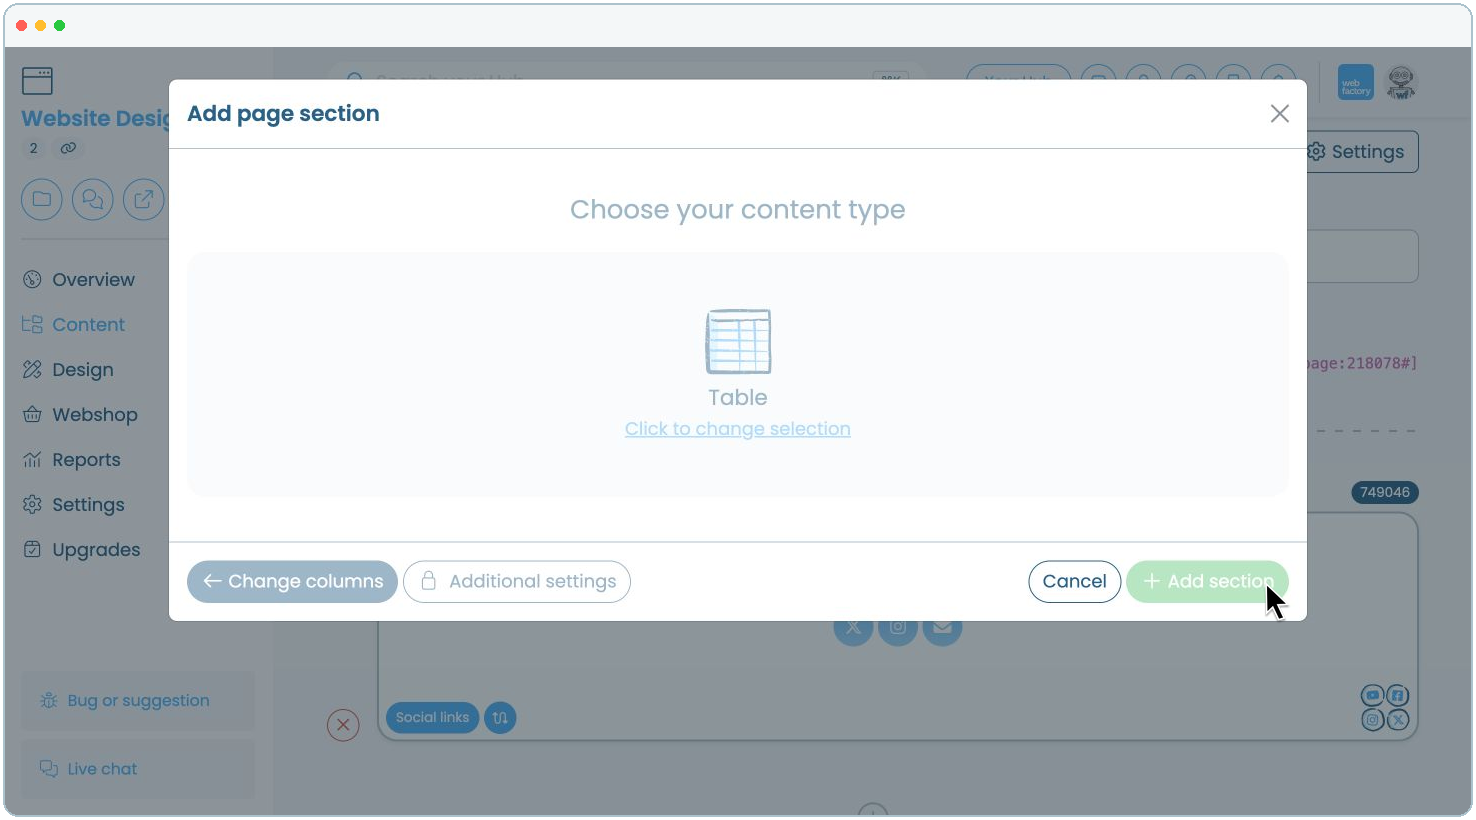
Then click 'Add section'.

Step 8

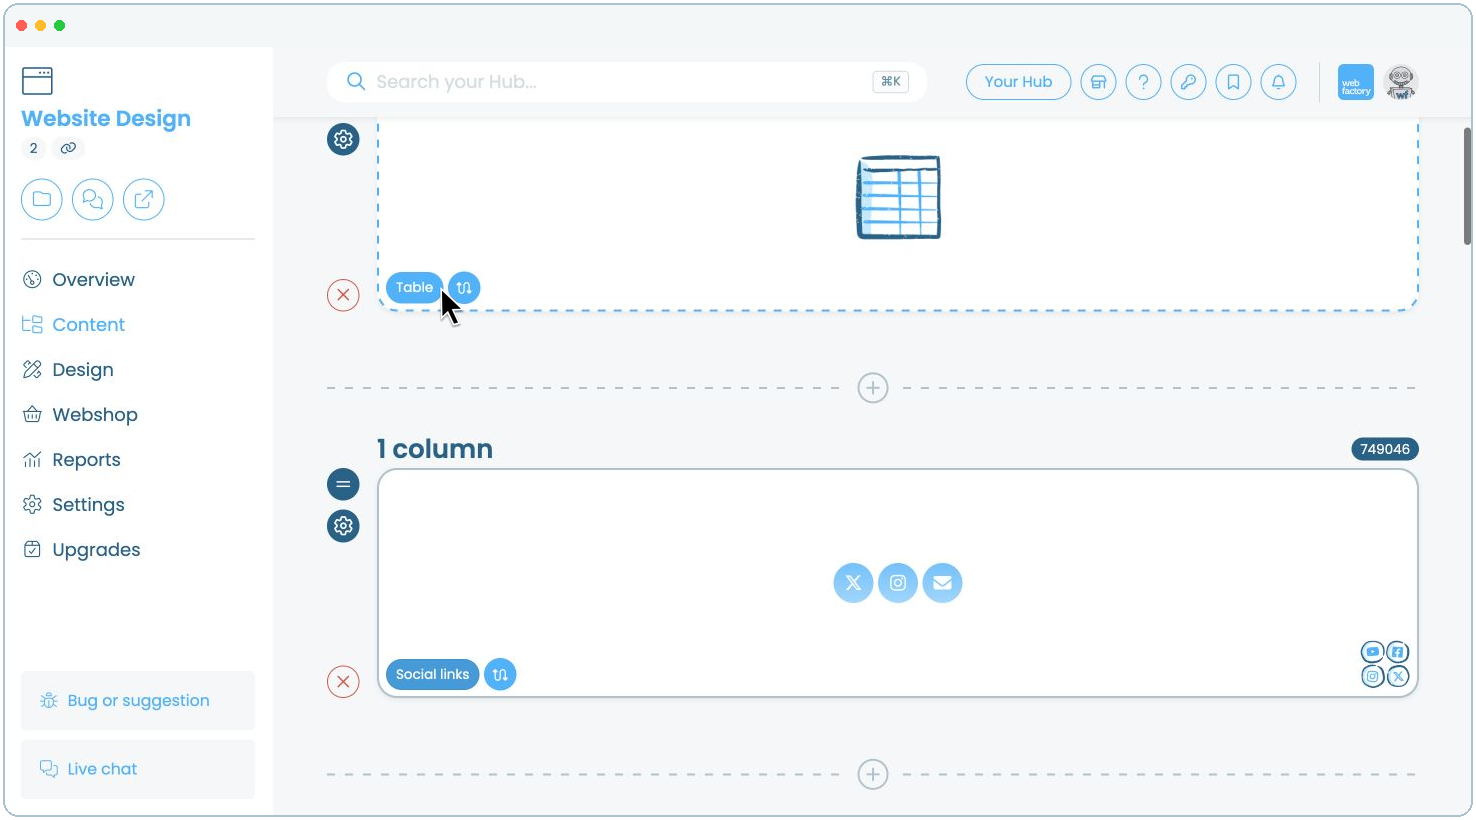
Click the new 'Table' element on your page.

Step 9

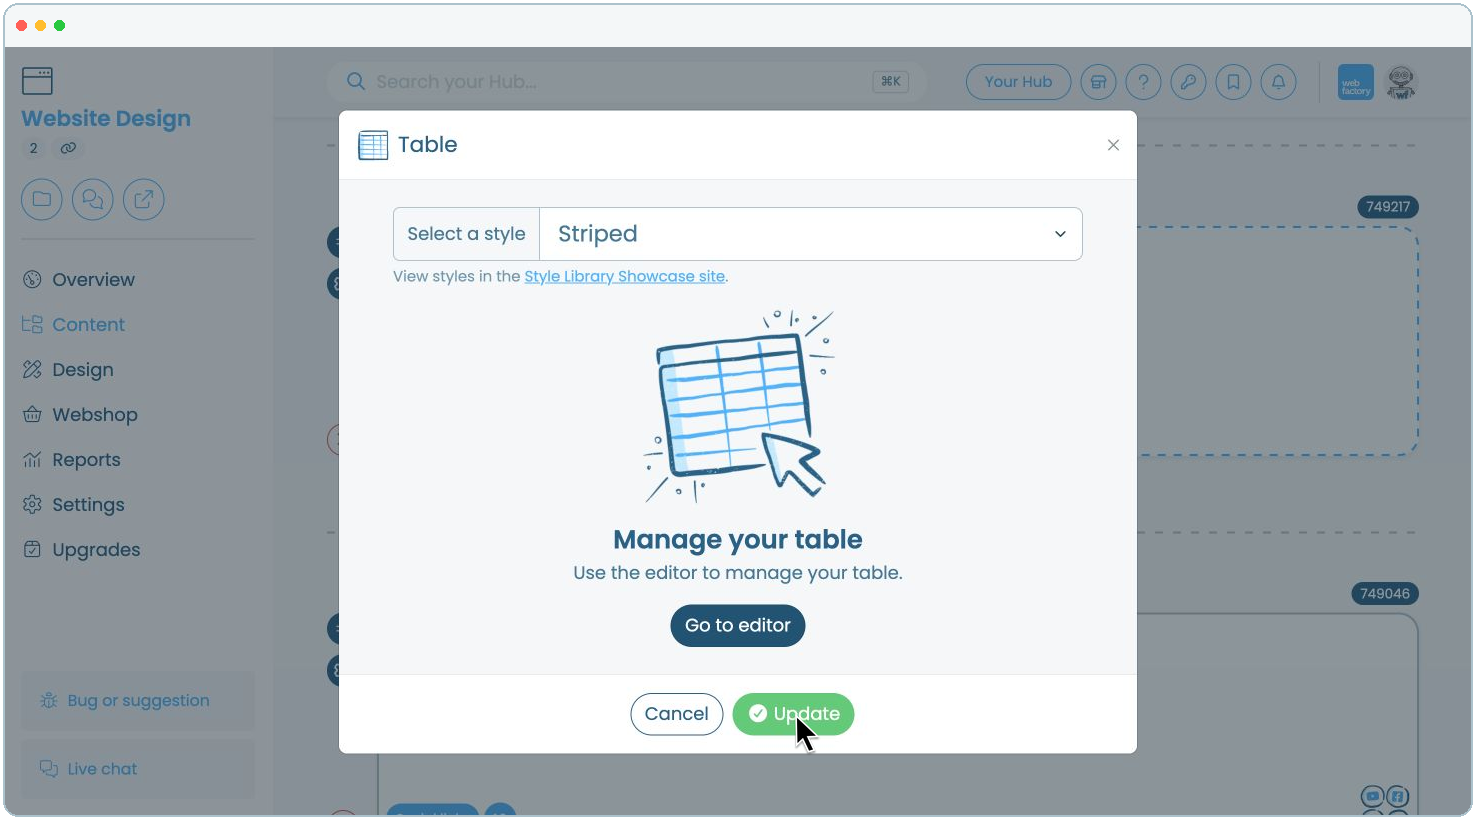
Choose a style, then click 'Update'.

Step 10

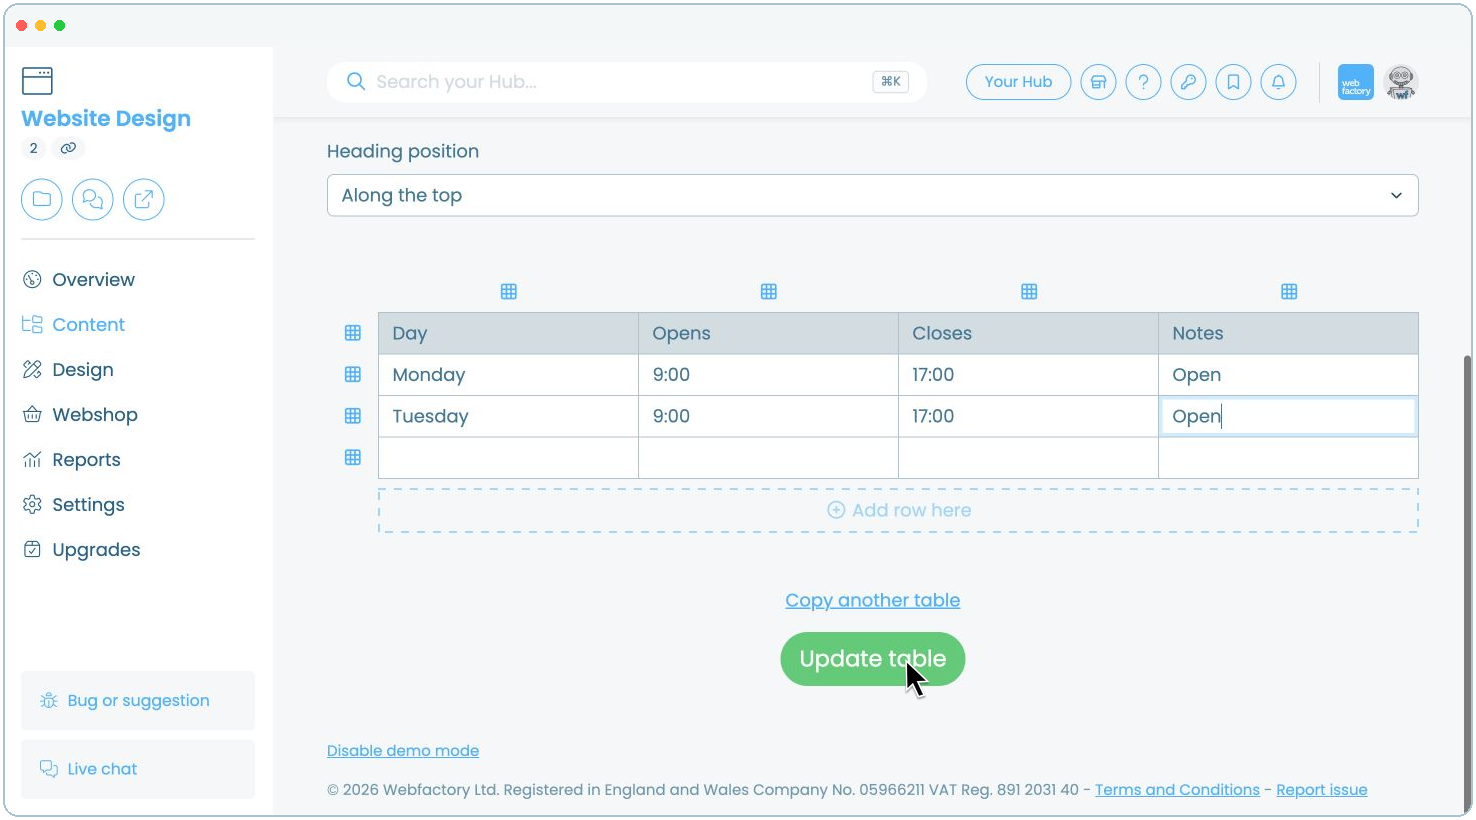
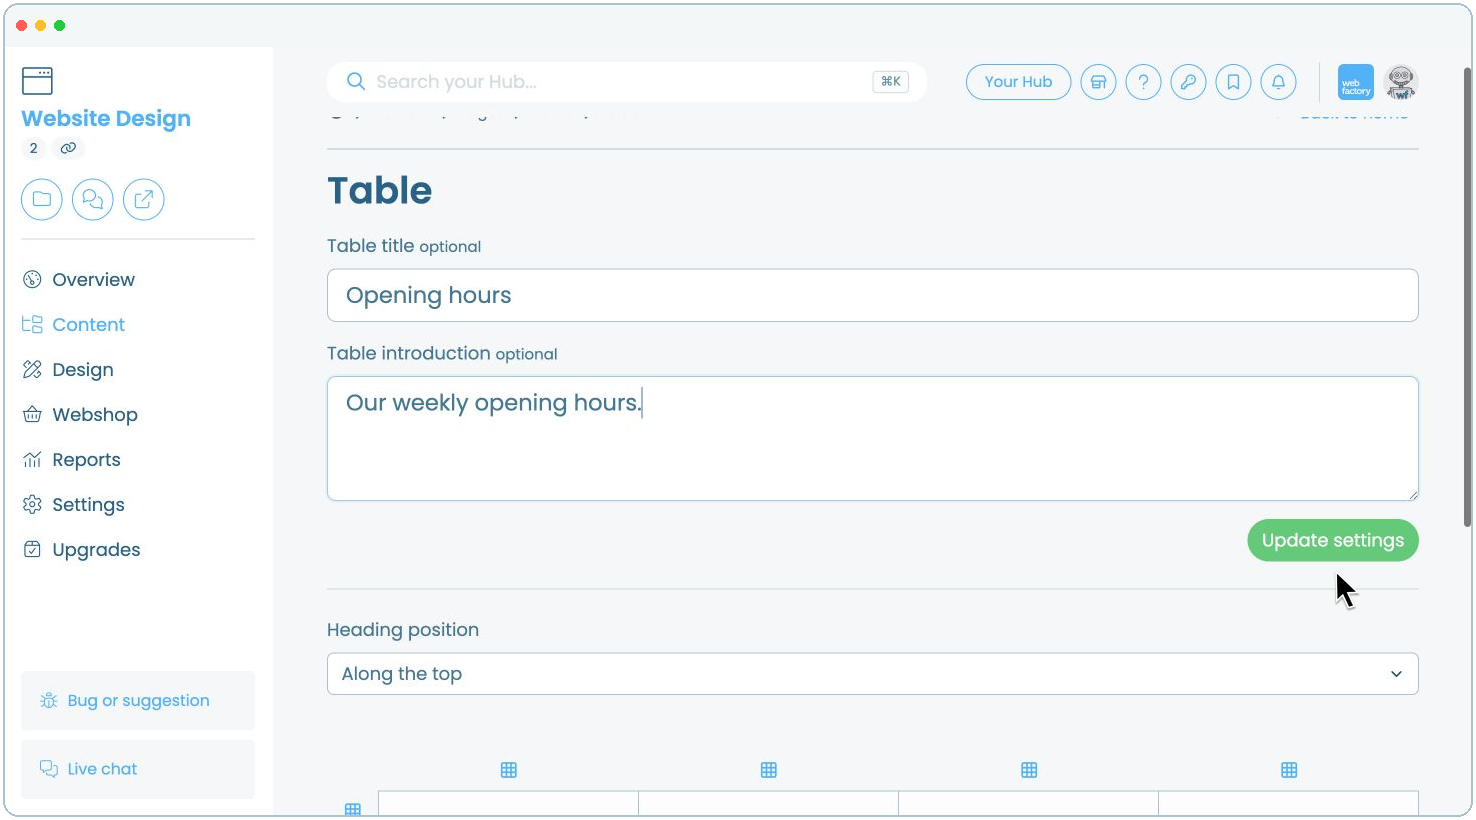
Enter an optional table title and introduction, choose the heading position, then click 'Update settings'.
Step 11

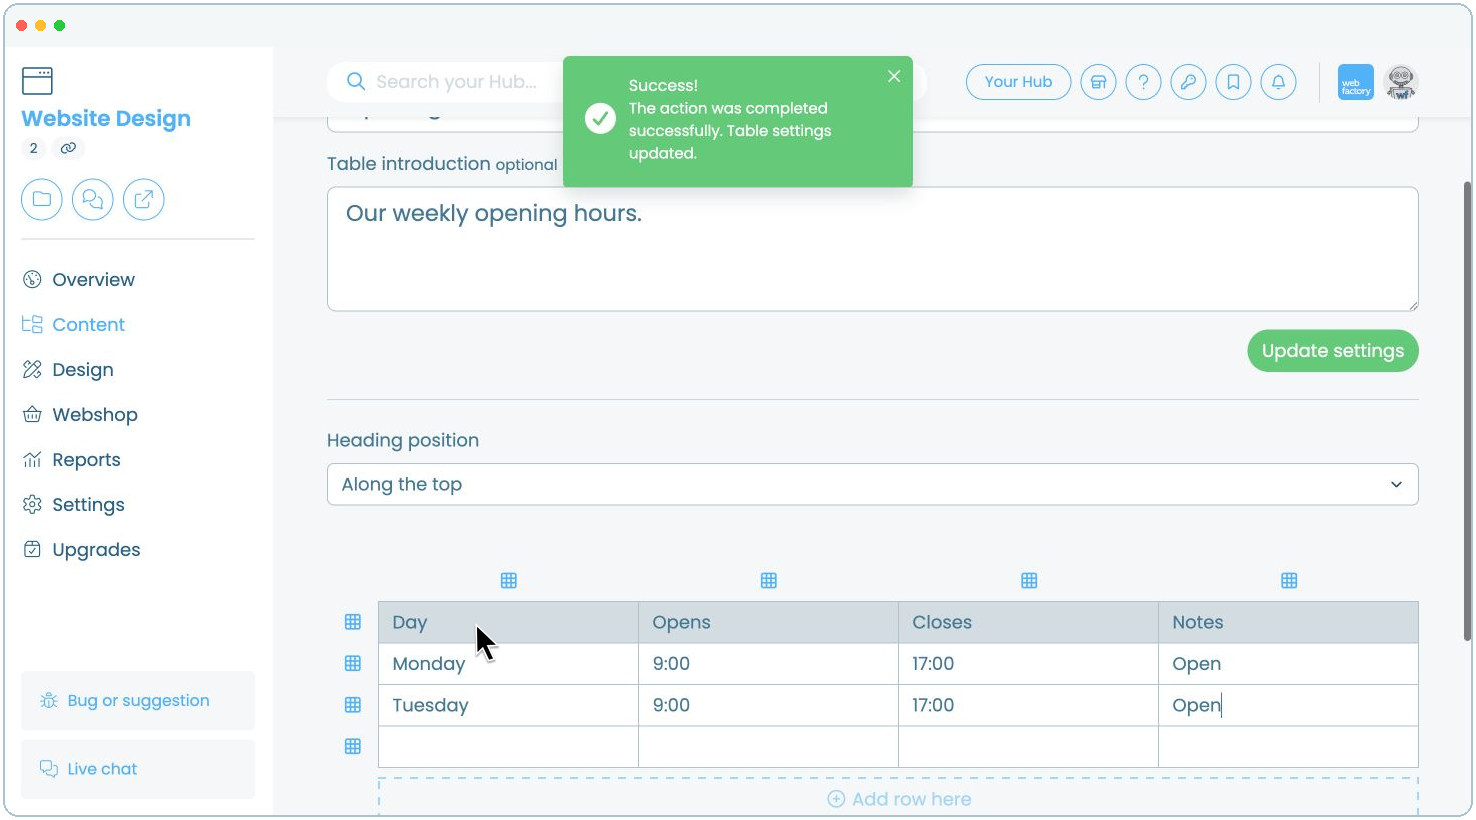
Enter your content in the table cells.

Step 12

Click 'Update table'.