How to edit, schedule, unpublish or remove a blog article
In this article, we'll guide you through editing, scheduling, unpublishing or removing an article or blog post from your website. If you need to create one first, see how to add articles and blog posts to your website.
In the website editor, go to 'Content'.
Click 'Articles'.
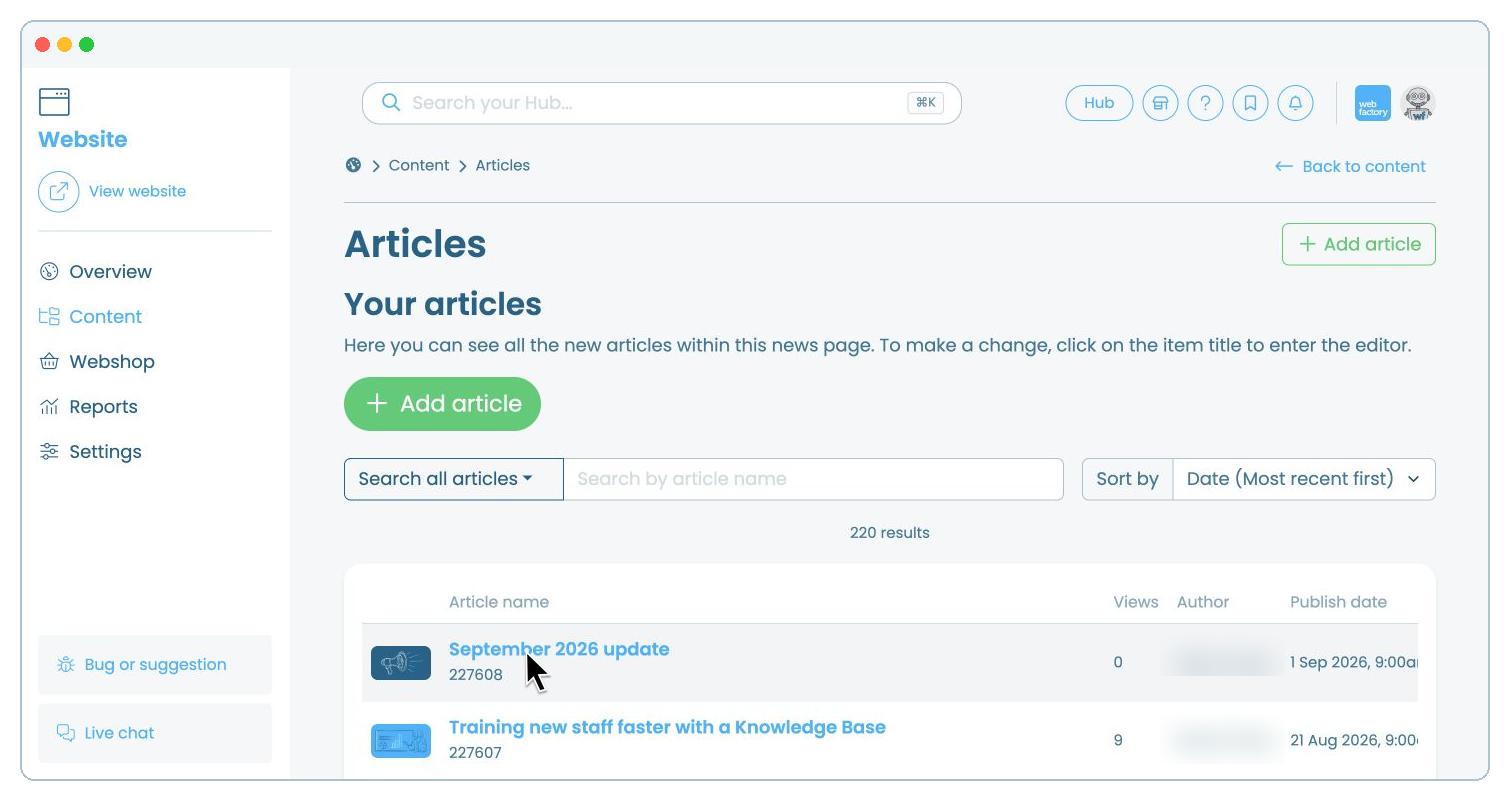
Make your changes, then click 'Update article'.
From 'Content', open 'Articles' and select the article you want to schedule.
In 'Publish date and time', choose the date and time you want the article to go live.
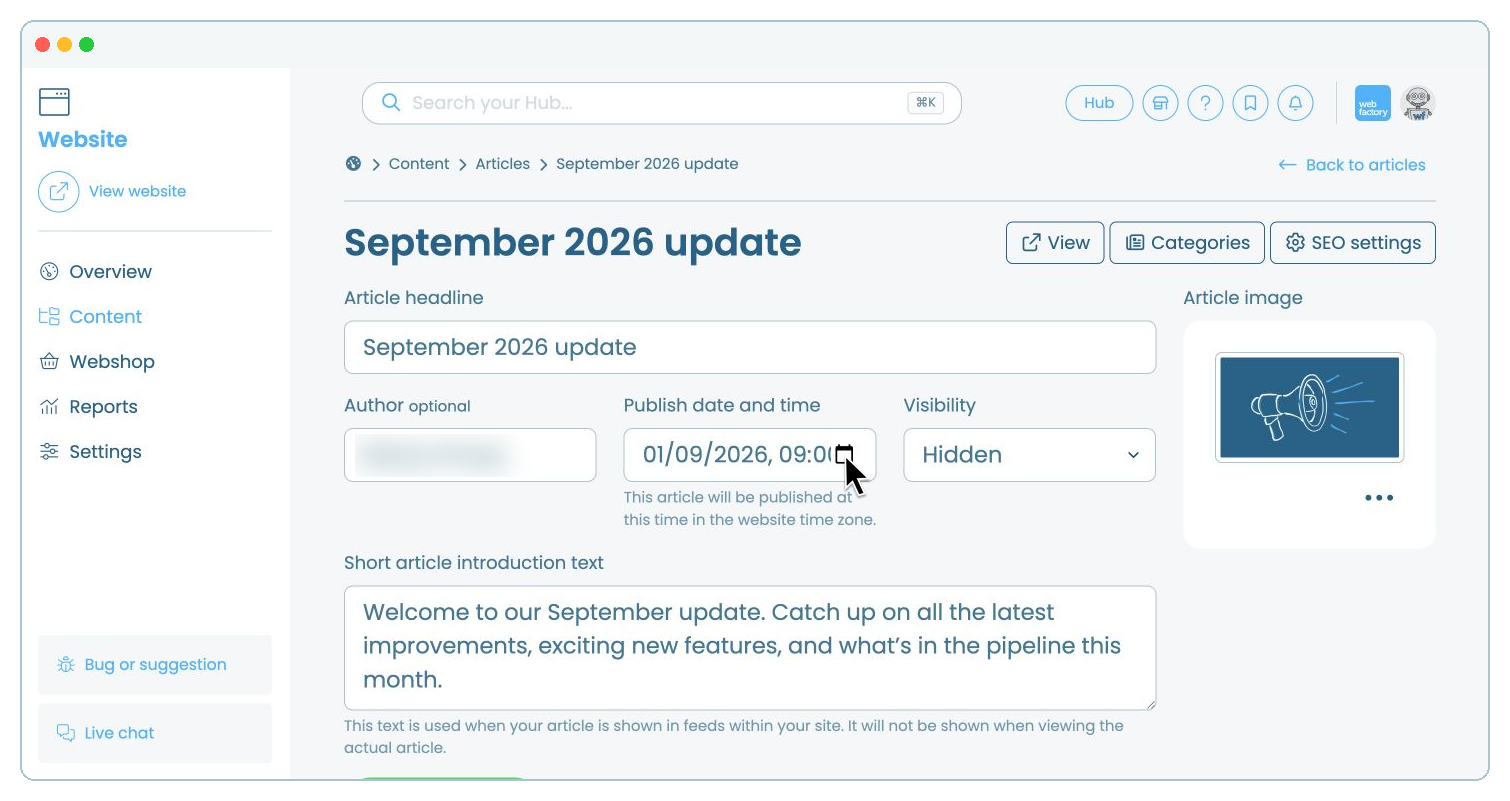
Set 'Visibility' to 'Visible from publish date'.
Click 'Update article'.
From 'Content', open 'Articles' and select the published article.
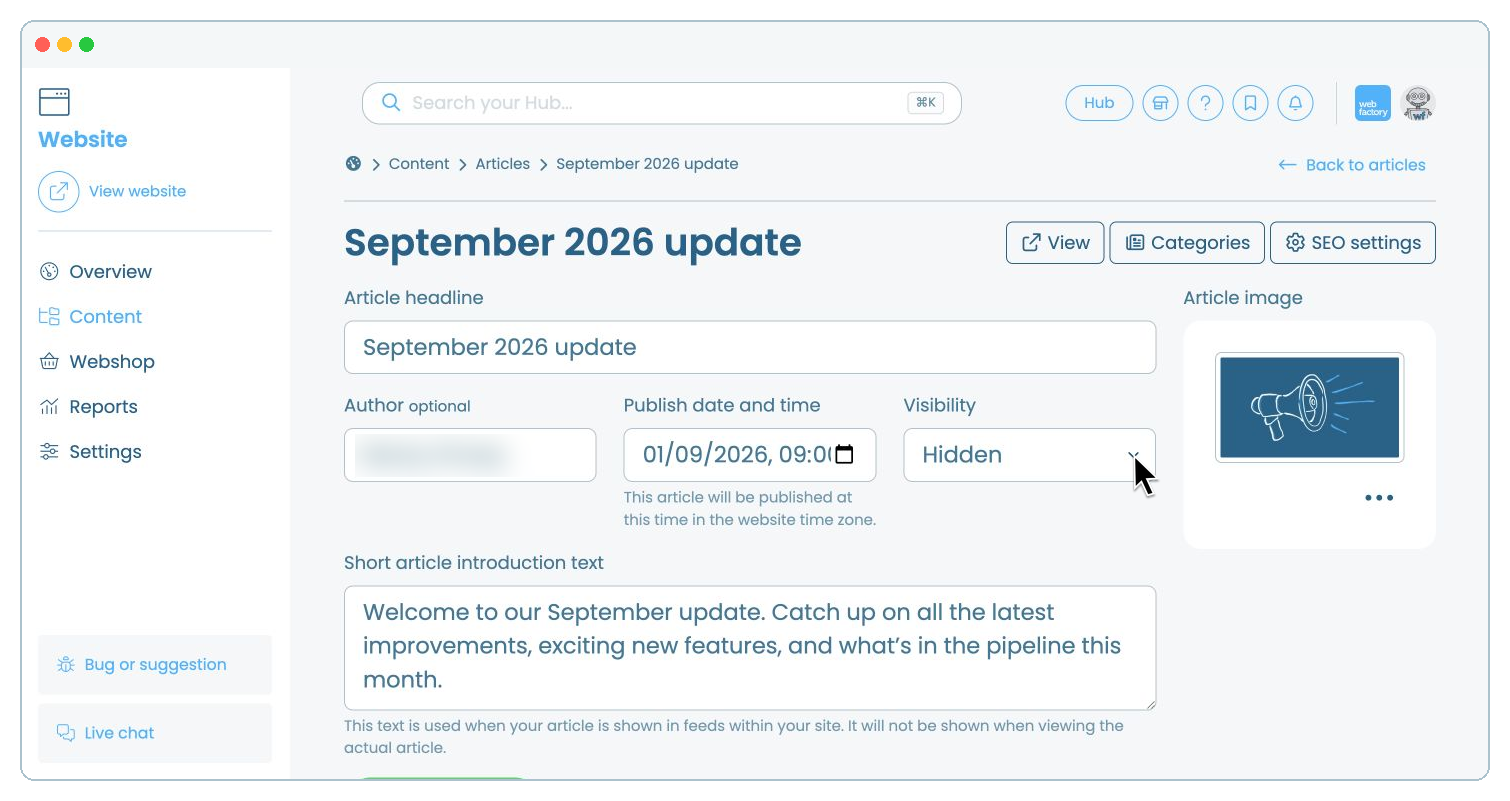
Click 'Update article'. The article will remain in the editor and can be republished later by changing its visibility.
From 'Content', open 'Articles'.
Open the three-dot menu beside the article.
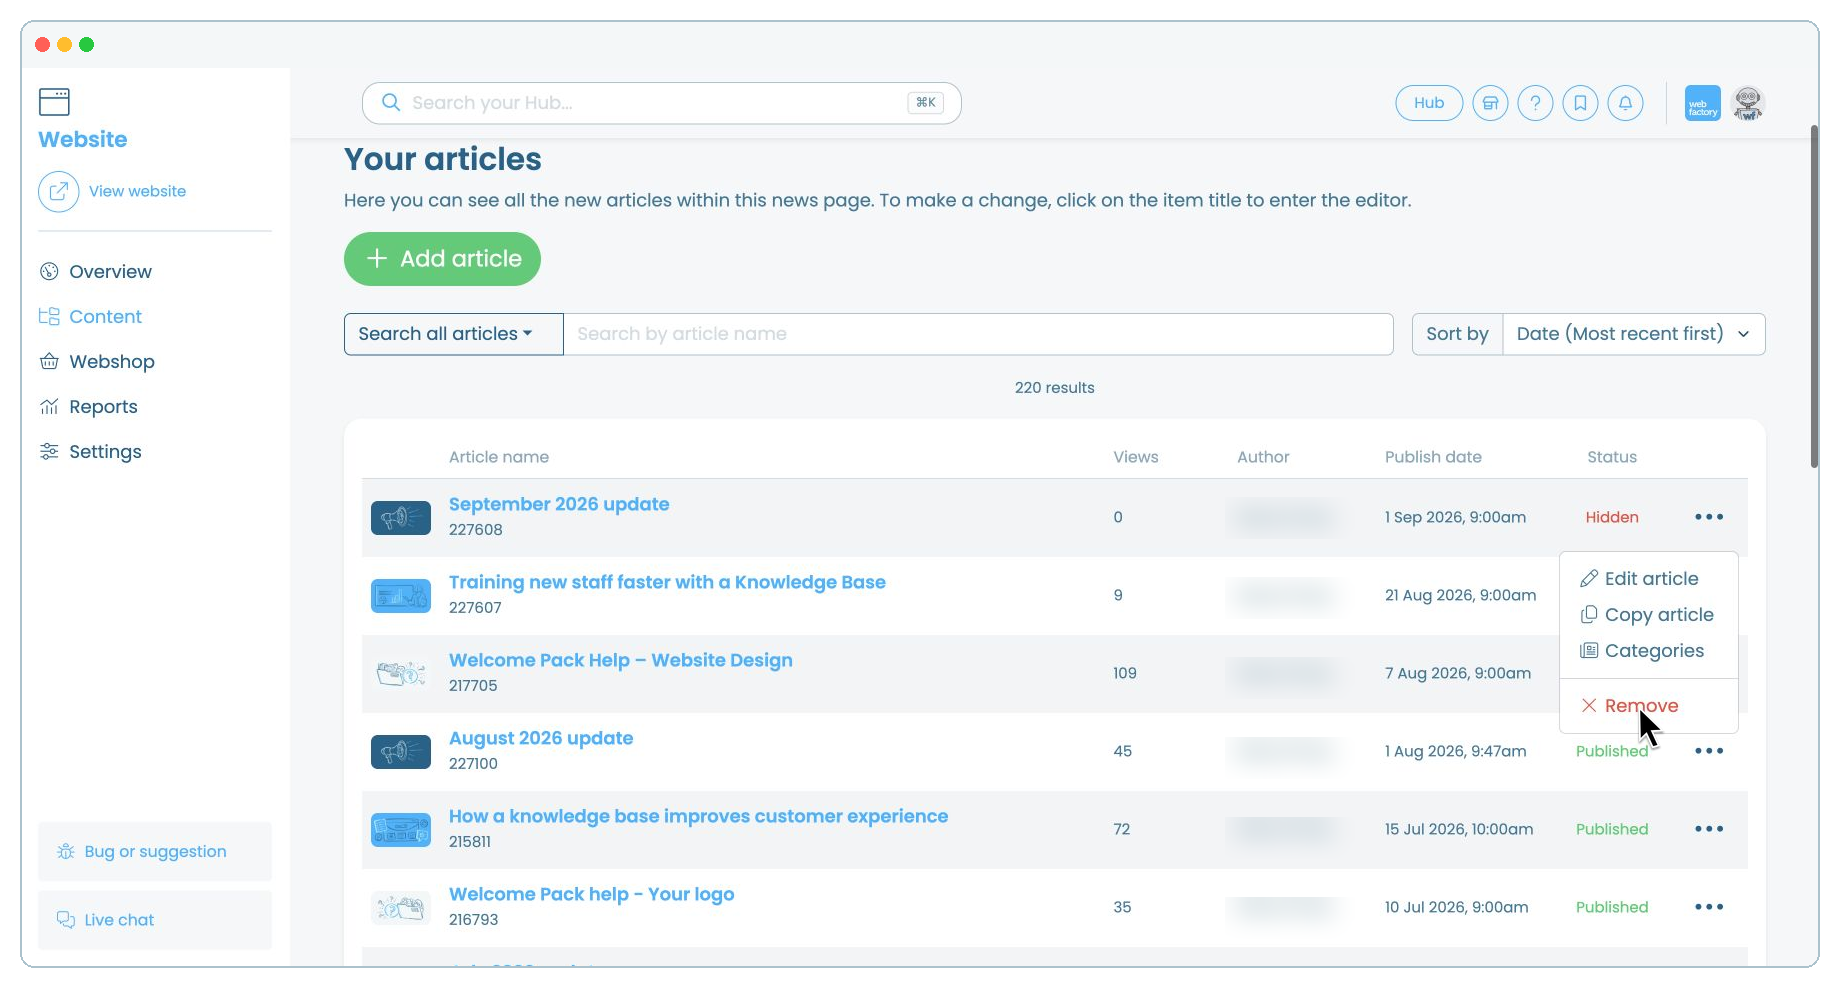
Confirm that you want to remove the article. Removing an article is permanent. If you may need it again, unpublish it instead.